Making a dumb dishwasher smart with an ESP32 in the door
An ESP32 on the lead between my dishwasher's panel and main board lets Home Assistant see minutes left and press Start. The factory safety stays.
- Difficulty
- Advanced
- Parts cost
- About A$30: ESP32-C3 ~A$15, logic analyser ~A$10, resistors ~A$1, wire
- Build time
- A weekend, longer if you have to decode your own model
- Skills
- Soldering, ESPHome, Multimeter, Logic analyser
The problem
People in our house load the dishwasher and forget to press Start. I wanted Home Assistant to start it, and to tell us how long is left. The panel can’t tell you that: it only has a few lights for the program, the delay and “finished”, and no time display at all.
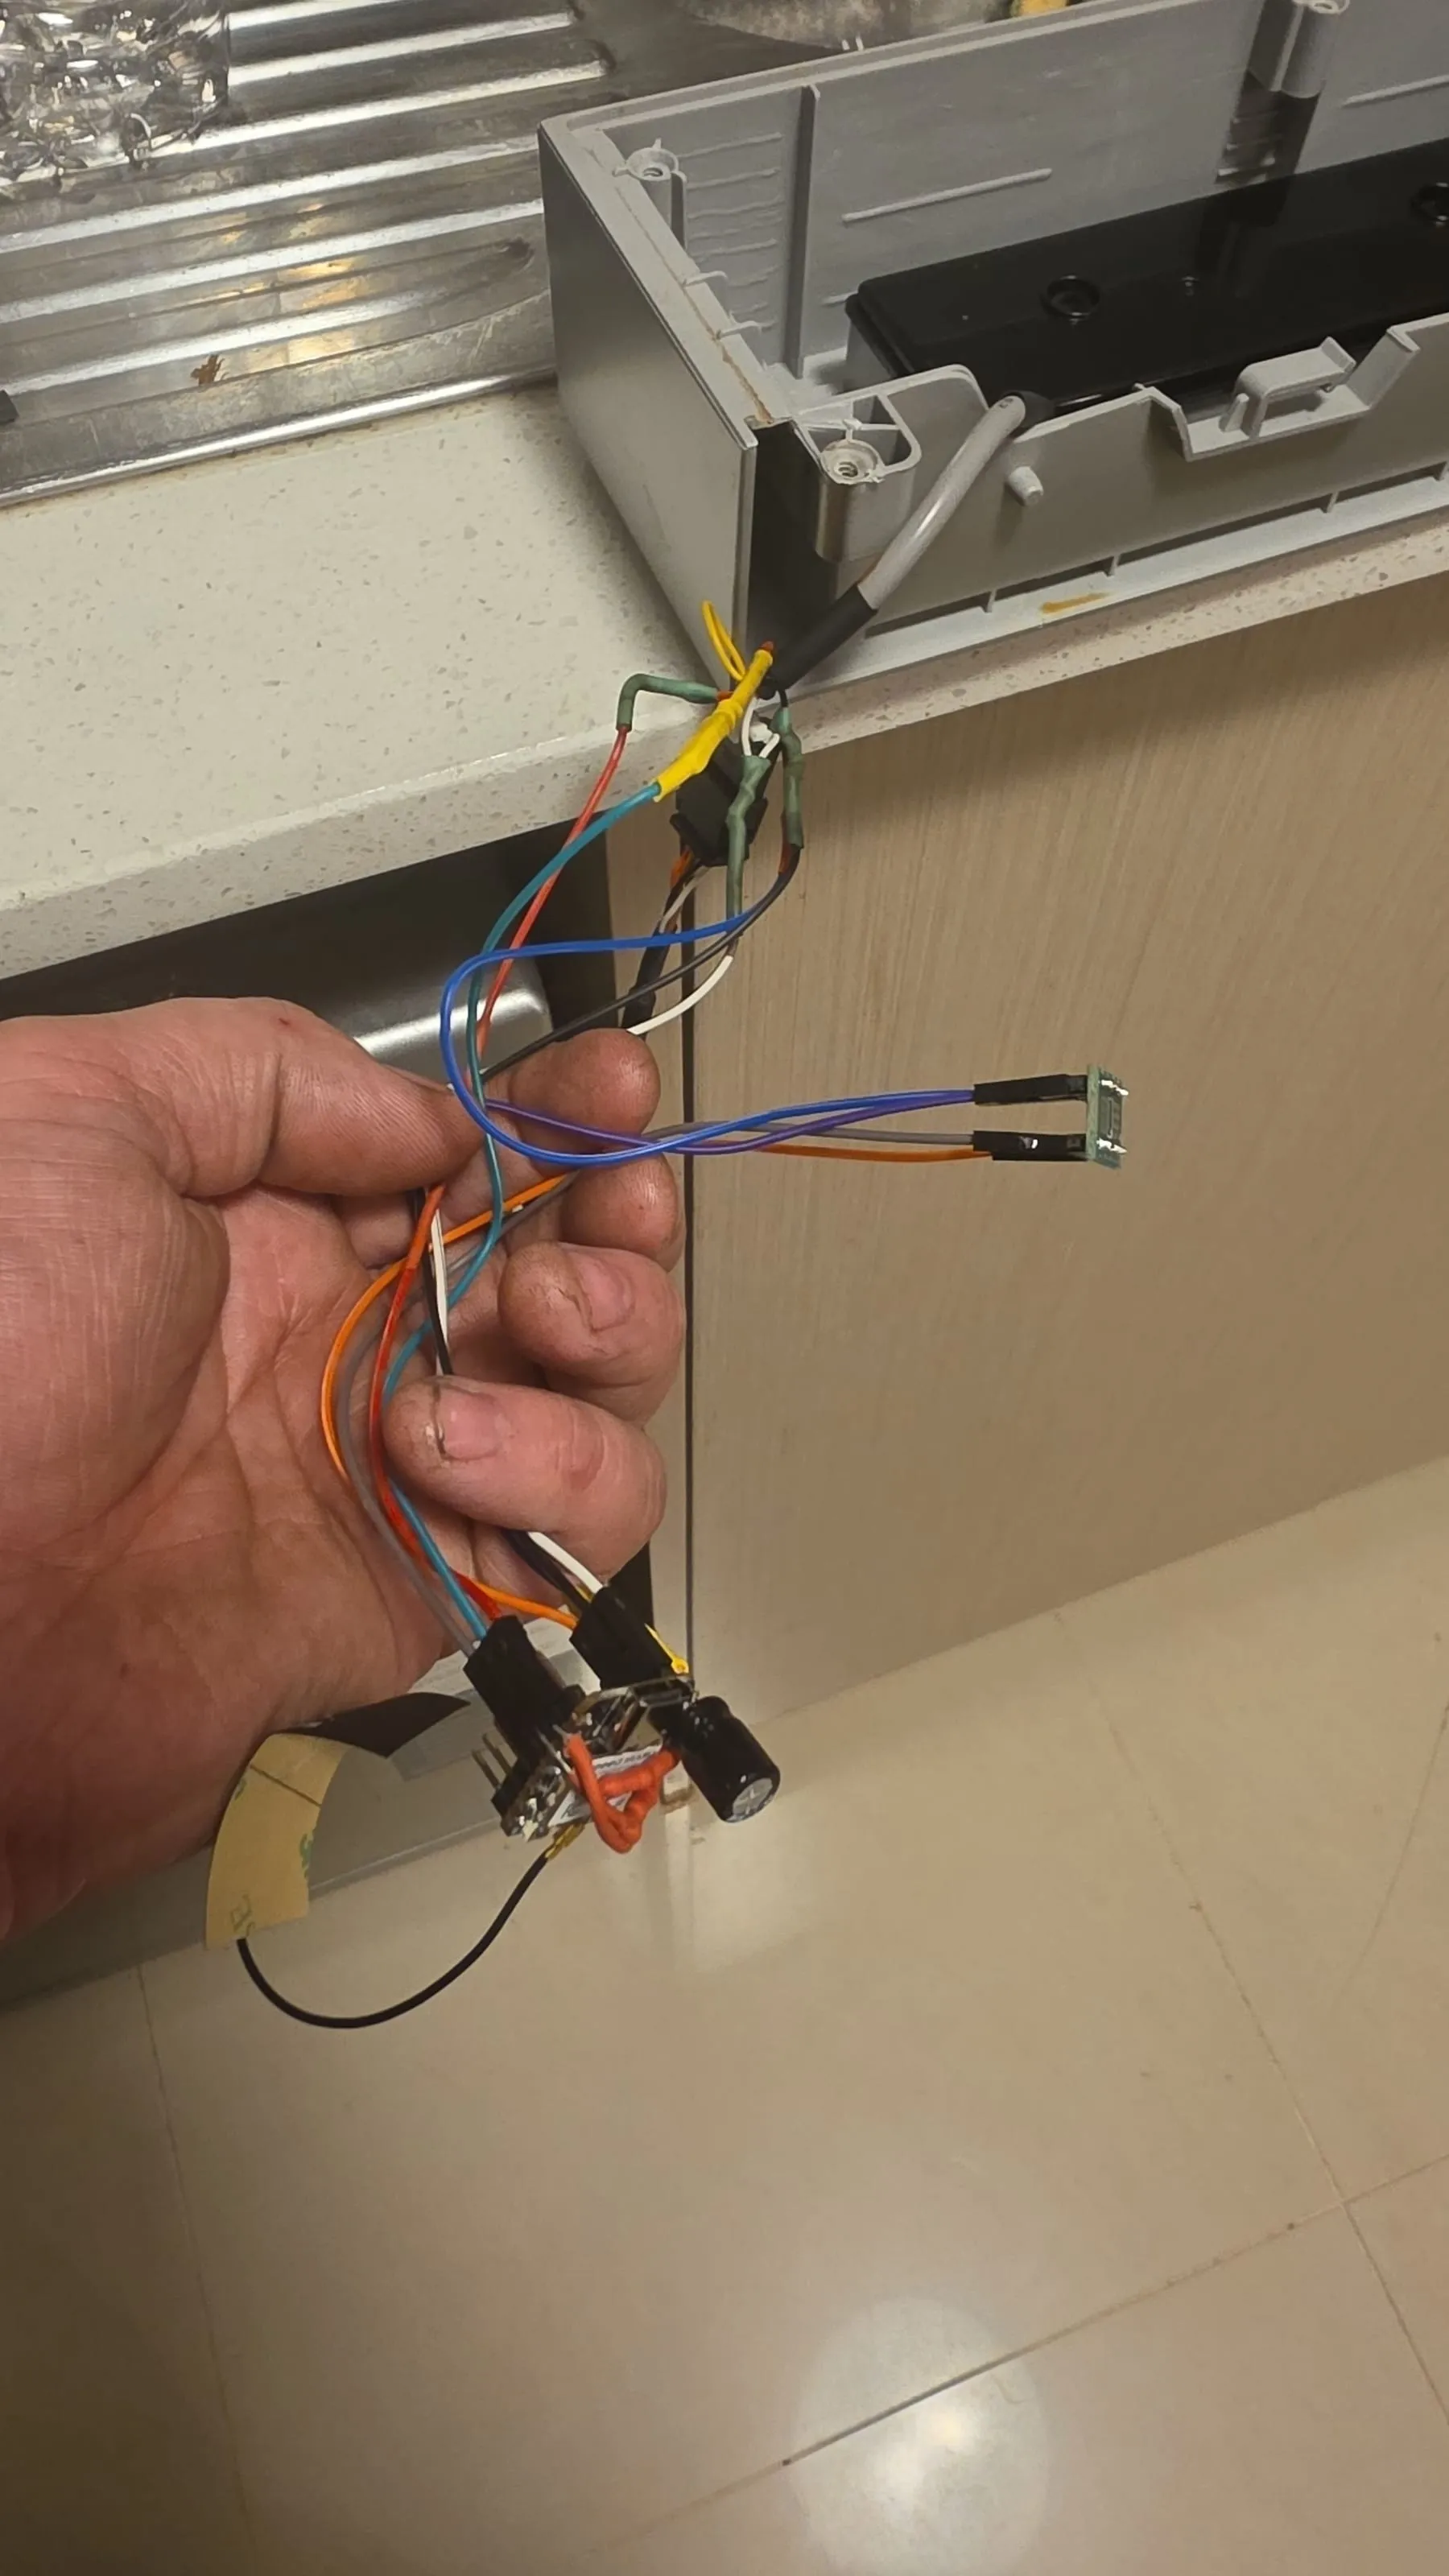
My first plan was to solder little solid-state relays across the panel’s button pads and read its lights with optocouplers (parts that pass a signal through light, so nothing is electrically joined). I bought the parts. Then I took the panel out and found a 5-wire lead joining it to the main board, and two of those wires were carrying serial data. The buttons never go down the lead as wires. The panel sends messages.
So instead of pressing buttons, the ESP32 now sits on that lead and speaks the dishwasher’s own language. Mine is a SÔLT GGSDW6013X. If yours is different, the idea still works, but you’ll have to decode your own messages (see the lessons).
How it works
The panel and the main board talk over two wires, one each way, at 9600 baud (a slow, simple serial link), about seven messages a second each way. I cut the brown wire (panel to main board) and put the ESP32 in the gap. It reads each message from the panel and sends it on to the main board about 30 ms late. The main board doesn’t mind. When Home Assistant asks for something, the ESP32 rewrites one passing message to look like a key press, fixes the checksum and sends that instead.
The red wire (main board to panel) is only tapped. The ESP32 reads the status from it: state, program, minutes left, water temperature, door open and a lifetime wash count.
The factory electronics still run the machine and keep all their safety interlocks. The ESP32 can only do what a finger on the panel could do, and the firmware refuses anything the real button wouldn’t do in that state. Power Off is refused while a wash is running or paused, so Home Assistant can never abort a wash. The panel display follows whatever the main board reports, so it stays in step with the presses the ESP32 slips in.
What’s on the wire
This is for my model. Yours may differ.
| Wire | What it is |
|---|---|
| White | +5 V supply for the panel (4.89 V, steady under load) |
| Black | 0 V |
| Brown | Data, panel → main board (buttons) |
| Red | Data, main board → panel (status) |
| Yellow | Unknown. 0 V when I measured it. Passed through untouched. |
The plug is a 5-pin JST SM, 2.5 mm pitch, in the order yellow, red, brown, black, white. The serial is 9600 baud, 8N1, idle high, 5 V logic.
Every message looks like 55 + length + that many data bytes + a check byte. The check byte is the
sum of the data bytes, keeping only the low 8 bits. The panel sends 27 data bytes, the main board 49.
Counting from 0 at the first byte after the length:
| From | Byte | Meaning |
|---|---|---|
| Panel | [1] | Key event, sent once: E5 setting key, E1 power on, E2 power off |
| Panel | [3] | Requested machine state |
| Panel | [5] | Program |
| Panel | [6] | Flags: 0x20 key held, plus 0x08 for the power key |
| Main board | [1] | Machine state |
| Main board | [2] | Wash stage. 0x32 = finished, held until the next program is chosen |
| Main board | [3] | Minutes remaining |
| Main board | [7] | Water temperature °C while running, the program’s target when idle |
| Main board | [9] | Program |
| Main board | [11] | Flags: 0x08 door open (works even when off) |
| Main board | [37] | Lifetime wash counter |
Programs: 2 Pots (178 min, 72 °C), 4 ECO (185 min, 50 °C), 5 Glass (125 min, 42 °C), 6 “90” (90 min, 65 °C), 7 Quick (30 min, 40 °C).
Machine states: 00, 01, 02 off (01 is a cold start after the power’s been off at the wall) · 10, 11 starting up · 12, 13 ready · 21 delayed start counting down · 31, 32 running · 33 paused (Start pressed mid-wash, or the door opened) · 34 finished, for about 9 seconds, then back to 13.
What you need
- Seeed XIAO ESP32-C3, the version with an external antenna (about A$15, AliExpress). The inside of a dishwasher door is a metal box, and the antenna matters (see the lessons).
- BSS138 MOSFET for the 3.3 V → 5 V level shift, with a 10k resistor to 3.3 V and another to 5 V.
- Four resistors (about A$1 all up) for the two input dividers: 10k and 22k for each data line. They drop the 5 V signals to about 3.4 V, which the ESP32 is happy with.
- 470 µF 16 V capacitor across the ESP32’s 5 V and GND.
- Hookup wire and a way to join into the loom.
- A multimeter.
- Only if your dishwasher isn’t the same model: a logic analyser. Mine is a cheap 24 MHz 8-channel one, about A$10 (AliExpress). Its inputs take 5 V at most. On any other model you’ll need it, because you have to decode your own messages.
Opening the dishwasher up and changing its wiring will very likely void the warranty. Make that call before you start.
A proper board is designed but not ordered yet. It has plugs for both ends of the lead, a jumper to put the dishwasher back to factory, and a diode so USB can’t feed power into the dishwasher. The next version will use a ready-made 4-channel level-shifter module instead of the loose MOSFET and resistors. Until that’s built and tested, this guide is the hand-wired version that’s in my door now.
Wiring
The brown wire is cut. The panel end goes into the ESP32, and the ESP32 drives the main-board end. Red is tapped, not cut. White and black power the ESP32.
| XIAO pin | GPIO | Connects to |
|---|---|---|
| D2 | 4 | Brown from the panel, through 10k, with 22k from the pin to GND |
| D1 | 3 | Red (tapped), through 10k, with 22k from the pin to GND |
| D3 | 5 | BSS138 source, plus 10k from the source to 3.3 V |
| 3V3 | BSS138 gate | |
| BSS138 drain → brown to the main board, plus 10k from the drain to 5 V | ||
| 5V | White (the panel’s 5 V), with the 470 µF capacitor to GND | |
| GND | Black |
Yellow and the rest of the lead are left alone.
I kept clear of D6 and D7, because the chip prints boot messages on GPIO21 when it starts, and of D0, D8 and D9, which are strapping pins (the chip reads them at power-up to decide how to boot).
The ESP32 lives in the door at the panel end, and it talks to Home Assistant over Wi-Fi only. Nothing else connects to it.
Firmware and config
The ESPHome config. It uses a small custom component, solt_dishwasher, that does the message
handling. It isn’t public yet; email me if you want it before it’s up. Put it in a components folder
next to the YAML.
# Dishwasher bridge: Seeed XIAO ESP32-C3, inline on the brown wire, tapped on red.
#   D2 (GPIO4) <- brown from the PANEL via 10k/22k divider
#   D1 (GPIO3) <- red tap via 10k/22k divider
#   D3 (GPIO5) -> BSS138 shifter -> brown to the MAIN BOARD
# NEVER plug USB in while it is wired to the dishwasher.
substitutions:
  name: dishwasher
  friendly_name: "Dishwasher"

esphome:
  name: ${name}
  friendly_name: ${friendly_name}

esp32:
  board: esp32-c3-devkitm-1
  variant: esp32c3
  framework:
    type: esp-idf

logger:
  hardware_uart: USB_SERIAL_JTAG
  level: DEBUG
  logs:
    sensor: INFO
    text_sensor: INFO
    binary_sensor: INFO

api:

ota:
  - platform: esphome

wifi:
  ssid: !secret wifi_ssid
  password: !secret wifi_password
  power_save_mode: none
  fast_connect: true
  output_power: 8.5dB   # the signal is strong in place; full power only adds current spikes
  ap: {}

captive_portal:

external_components:
  - source:
      type: local
      path: ./components
    components: [solt_dishwasher]

uart:
  - id: panel_uart      # brown: RX from the panel, TX on to the main board
    rx_pin: GPIO4
    tx_pin: GPIO5
    baud_rate: 9600
    rx_buffer_size: 512
  - id: main_uart       # red: main board -> panel, listen only
    rx_pin: GPIO3
    baud_rate: 9600
    rx_buffer_size: 512

solt_dishwasher:
  id: dw
  panel_uart_id: panel_uart
  main_uart_id: main_uart
  status:
    name: "Status"
  program:
    id: dw_program
    name: "Program"
  options:
    name: "Options"
  minutes_remaining:
    name: "Time Remaining"
  temperature:
    name: "Water Temperature"
  delay_remaining:
    name: "Delay Remaining"
  door:
    name: "Door"
  finished:
    name: "Wash Finished"
  stage_code:
    name: "Stage Code"
  wash_count:
    name: "Wash Count"
  panel_link:
    name: "Panel Link"
  main_link:
    name: "Main Board Link"

button:
  - platform: restart
    name: "Restart"
  - platform: template
    name: "Start"
    icon: mdi:play
    on_press:
      - lambda: id(dw).start();
  - platform: template
    name: "Pause or Resume"
    icon: mdi:play-pause
    on_press:
      - lambda: id(dw).pause_resume();
  - platform: template
    name: "Power On"
    icon: mdi:power-on
    on_press:
      - lambda: id(dw).power_on();
  - platform: template
    name: "Power Off"
    icon: mdi:power-off
    on_press:
      - lambda: id(dw).power_off();

select:
  - platform: template
    name: "Choose Program"
    icon: mdi:dishwasher
    options: ["Pots", "ECO", "Glass", "90 min", "Quick"]
    # Shows what the main board reports; picking one sends the program key.
    lambda: |-
      const std::string &p = id(dw_program).state;
      if (p == "Pots" || p == "ECO" || p == "Glass" || p == "90 min" || p == "Quick") return p;
      return {};
    update_interval: 2s
    set_action:
      - lambda: id(dw).set_program(x);

sensor:
  - platform: wifi_signal
    name: "WiFi Signal"
    update_interval: 10s
  - platform: uptime
    name: "Uptime"
    update_interval: 10s
  - platform: internal_temperature
    name: "ESP Temperature"
    update_interval: 60s

text_sensor:
  - platform: debug
    reset_reason:
      name: "Reset Reason"

debug:
  update_interval: 60s
The heart of the component is this: take one message from the panel that isn’t already carrying a key press, write the key in, set the “key held” flag, make the change, and redo the checksum.
void SoltDishwasher::apply_pending_(std::vector<uint8_t> &f) {
  if (this->pending_what_ == nullptr || f[1] != 0x1B)
    return;
  uint8_t *p = f.data() + 2;   // the data bytes, after 55 and the length
  if (p[1] != 0x00)
    return;                    // a real key press is in this one: leave it alone
  p[1] = this->pending_key_;   // E5 setting, E1 power on, E2 power off
  p[6] |= this->pending_flags_;
  this->pending_edit_(p);      // e.g. p[3] = 0x30 for Start
  uint8_t sum = 0;
  for (size_t i = 2; i < f.size() - 1; i++)
    sum += f[i];
  f.back() = sum;
  this->pending_what_ = nullptr;
}| Home Assistant control | Sends | Only allowed when |
|---|---|---|
| Start | E5, state 30 | Ready, door closed |
| Pause or Resume | E5, state 33 / 31 | Running / Paused |
| Choose Program | E5, program byte | Ready |
| Power On | E1, state 10, and ECO if no program is set | Off |
| Power Off | E2, state 00 | Ready or delayed start. Never while a wash runs or is paused. |
A Home Assistant script that starts a Pots wash. It’s a cut-down version of the automation that runs mine every morning, which also skips the day if the last load hasn’t been emptied yet.
script:
  dishwasher_start_pots:
    alias: "Dishwasher: start a Pots wash"
    mode: single
    sequence:
      # Door open (or left ajar to dry) = don't start
      - condition: state
        entity_id: binary_sensor.dishwasher_door
        state: "off"
      - condition: state
        entity_id: sensor.dishwasher_status
        state: ["Off", "Ready"]
      - if:
          - condition: state
            entity_id: sensor.dishwasher_status
            state: "Off"
        then:
          - action: button.press
            target:
              entity_id: button.dishwasher_power_on
          - wait_template: "{{ is_state('sensor.dishwasher_status', 'Ready') }}"
            timeout: "00:00:45"
            continue_on_timeout: false
      - action: select.select_option
        target:
          entity_id: select.dishwasher_choose_program
        data:
          option: "Pots"
      - wait_template: "{{ is_state('sensor.dishwasher_program', 'Pots') }}"
        timeout: "00:00:30"
        continue_on_timeout: false
      - action: button.press
        target:
          entity_id: button.dishwasher_start
      - wait_template: "{{ is_state('sensor.dishwasher_status', 'Running') }}"
        timeout: "00:01:00"
        continue_on_timeout: false
Step by step
- Unplug the dishwasher at the wall. Read the safety box again.
- Build the ESP32 side on the bench: the two dividers, the BSS138 with its two pull-up resistors, and the 470 µF capacitor.
- Flash the firmware over USB now, on the bench, while it’s connected to nothing else. Check it joins Wi-Fi and shows up in Home Assistant. From here on, updates go over Wi-Fi.
- Get to the 5-wire lead between the panel and the main board. On mine, I took the control panel out of the door to get at it.
- Check the wires with a meter against black before you cut anything. On a different model, this is where you’d capture the messages with a logic analyser (see the safety box).
- Cut brown. Panel end to the D2 divider. Main-board end to the BSS138 drain.
- Tap red to the D1 divider. Don’t cut it.
- Join white to the XIAO’s 5V pin and black to GND, with the capacitor across them.
- Check every join is solid. My only reset so far was a loose joint.
- Put the panel back in, close up, and plug the dishwasher in. Don’t touch the ESP32 with USB again.
- In Home Assistant, check Panel Link and Main Board Link are both on, then work through the tests below.
If it ever stops working: in normal use the main board only hears the panel through the ESP32. If the ESP32 dies, the panel loses the main board. The fix is to unplug the dishwasher, then rejoin the two cut ends of brown. It’s then exactly as it left the factory. (The board, when it’s built, does this with a jumper, and keeps listening so Home Assistant still sees the status.)
Testing it
- Power. With the ESP32 running off the panel’s 5 V, the white wire read 4.89 V and didn’t move when a wash started. Watch Uptime and Reset Reason in Home Assistant through a whole wash: uptime should only go up.
- Links. Panel Link and Main Board Link both on means messages are flowing both ways.
- Status. Open and close the door and watch Door follow, even with the machine off. Choose a program on the panel and watch Program follow.
- Controls. From Home Assistant I checked Power On, Choose Program, Start, Pause, Resume and Power Off on the real machine. The panel display followed each one. Power Off during a wash was refused, which is what it should do. Power On when it was already on was refused too.
- A whole wash. Time Remaining counts down a minute at a time. Opening the door mid-wash pauses it, and closing the door resumes it by itself. At the end the status shows Finished for about 9 seconds, then Ready, and Wash Finished stays on until the next program is chosen. The Wash Count went from 43 to 44.
- Logs. At DEBUG level the component logs every message that changes, as
panel>andmain>lines of hex. That’s the easiest way to map anything new.
Once, after an over-the-air update, Home Assistant showed Main Board Link as unavailable while the ESP32 said it was on. Reloading the ESPHome integration entry fixed it.
Lessons learnt
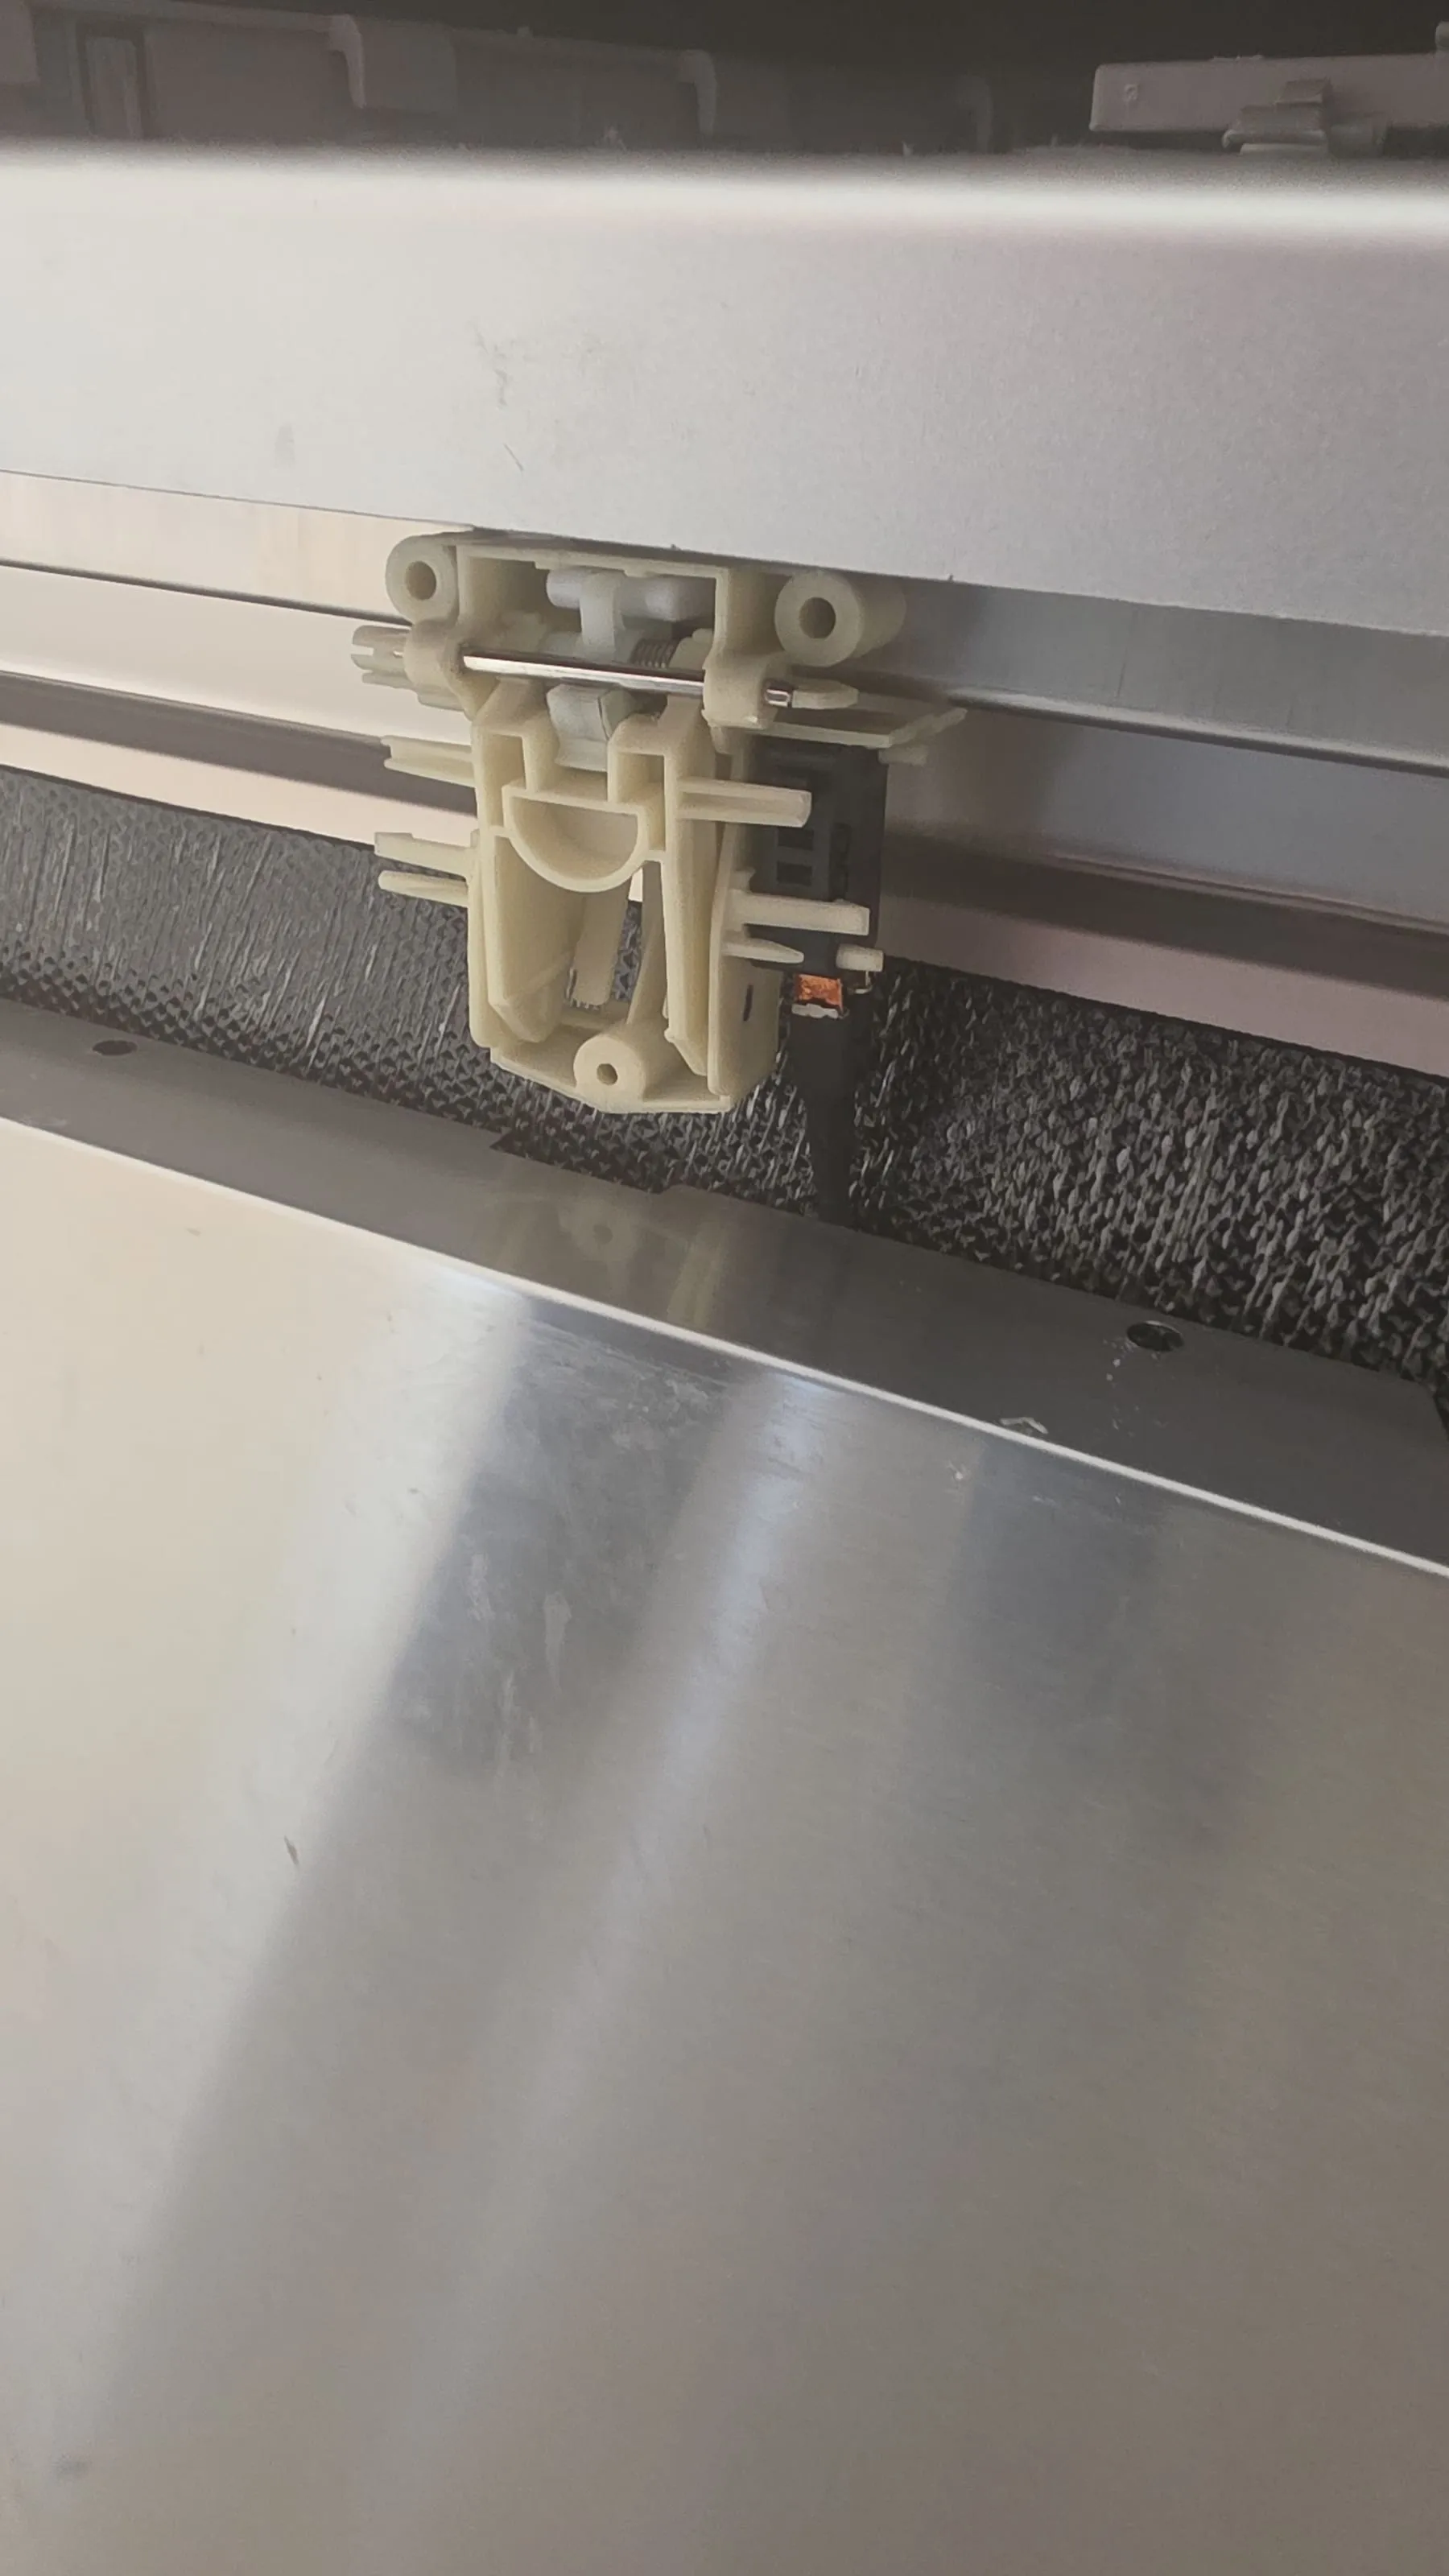
I took a 240 V shock from the door-latch switch. I had the control panel out of the door to get at the lead, and the latch switch was exposed. That switch carries mains. I touched it and got a shock. The low-voltage lead you’re working on sits right next to a 240 V part. Unplug the dishwasher at the wall before you open it, and if you have to measure anything live, cover the latch switch first.
I still don’t know for sure that the 5 V side is isolated from mains. Between the 0 V wire and earth my meter read 19 V AC. On a high-impedance meter that can just be leakage, and it fell to nothing under a 10 kΩ load. To the plug’s active and neutral pins I measured about 1.2 MΩ each, which isn’t a clean “open” either. So the rules stayed: the ESP32 is powered from the panel, talks over Wi-Fi only, and never has USB plugged in while it’s wired in.
My first plan was built on a wrong guess. I assumed the buttons couldn’t be reached on the lead, so I bought solid-state relays and optocouplers to wire across the panel’s button pads. Those parts are spares now. Open it up and look at the lead before you buy anything.
The logic analyser software decoded the same wire twice. On my saved captures, sigrok’s built-in serial decoder gave me the same channel for both wires, so the “two directions” looked identical. I wrote a small Python decoder that reads each channel’s bits myself. Check that the two directions actually differ before you trust a decode.
After a power cut the dishwasher reports “off” with a different code. Normally off is 00 or 02. After the power had been off at the wall, the main board said 01, a cold start. My own safety check didn’t know 01, so it refused Home Assistant’s Power On. Once that was fixed, it powered on with no program selected. The panel’s own power button picks ECO in that case, so the firmware now does the same.
A cheap ESP32 board couldn’t hold Wi-Fi. My first board, a C3 Super Mini, read −76 dBm on Wi-Fi two metres from the laptop. The XIAO with an external antenna read −23 dBm at the same desk, and −28 to −46 dBm inside the door. Inside a metal door, pay for the antenna.
Home Assistant got stuck on “Running”. A wash switched off halfway never sent “finished”, so my dashboard sat on Running. My automation now treats Off or Ready, without a finish, as the wash being abandoned.